Sunday, June 26, 2011

TASTY MEATLOAF

Here's a recipe that's easy enough prepare any day of the week. In fact, I wish you would. It will yield two nice loaves so you can easily have one for dinner, and one for a reserve meal later in the week, or if you're feeding more people, just make one large one. For the mixture part of the recipe, dig deep in your vegetable drawers. You'll likely have some of the ingredients on hand, and if not, the basic version is fine. The additional ingredients simply add to the complexity of the flavors. Let your imagination and your on-hand supplies give you the opportunity to be creative.

1 round onion, diced into 1/4" pieces
3 cloves whole garlic, finely chopped
2-3 stalks of celery, finely diced
1/2 pk of fresh mushrooms (optional)
1/2 bell pepper (green, red or orange), finely diced (optional)
10 - 12 slices of bacon, (4-6 pieces into 1/4" inch pieces and reserve another 4-6 slices for the loaf)
1 cup seasoned breadcrumbs (HINT: I used stale flavored bread and ground it up in a food processor - excellent option)
1 egg
1/2 cup parmesan cheese
1 1/2 lbs. ground beef
1 lb. ground pork
1/2 to 1 cup barbeque sauce (optional)
Salt & pepper to taste

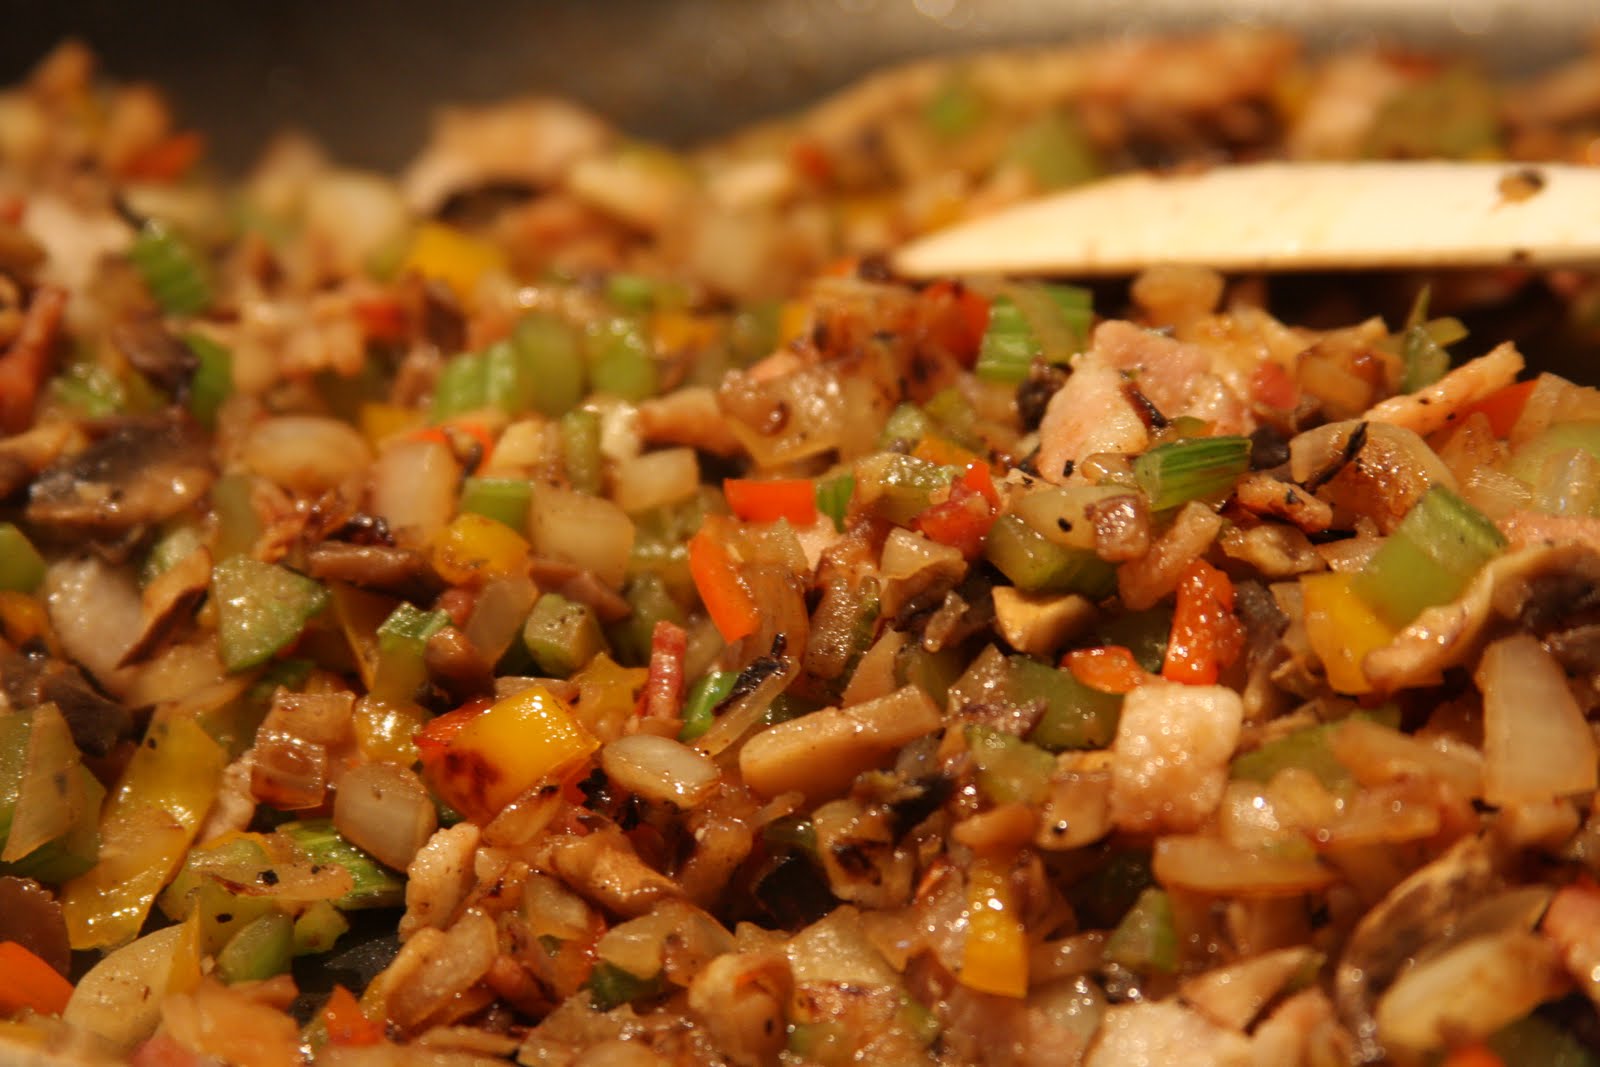
In a large saute pan over medium heat, cook the onions, garlic, celery, and bacon (plus any of the additional ingredients) in a drizzle of olive oil for about 8 to 10 minutes, or until all the ingredients begin to soften and take on a slightly browned color. Set aside to cool for at least 10 to 15 minutes.
Place the pork and beef in a separate bowl.
When the mixture has cooled, add it to the meat along with the egg, bread crumbs and cheese.
Using your hands, gently mix everything together until it is well blended. This is the only way to do this. Dig way to the bottom of the bowl to make sure that everything is well combined.
Season with salt and pepper. Do not over mix. Prepare a large 9 x 13 pan by spraying a little bit of cooking spray (aka PAM) and wipe off the excess. Divide the meat mixture into two and shape both pieces into a loaf, directly in the pan. If you prefer, shape the entire mixture into one large loaf. Place bacon strips over the top of the meatloaf and carefully spread barbecue sauce over the bacon. Cover tightly and bake at 375 degrees for about 1 hour. You will need to check it before the hour is up to make sure that it is not overcooking. Remove the cover and bake for another 10 minutes. After it is done, let it set for about 15 minutes to let it rest and allow the juices to redistribute throughout the loaf. Serve with rice or mashed potatoes and a nice green salad. Enjoy!

Sunday, June 12, 2011

GROWN UP GRILLED CHEESE SANDWICH

Today's sandwich was heavily inspired by one of my favorite Food Network shows, "Down Home With The Neely's." After my usual Saturday wake up to the food channel, I knew I had to try this sandwich. As usual, I called upon my refrigerator to see what ingredients I already had. Lucky for me, these are the ingredients which quickly made this sandwich come together. Enjoy!

One loaf of Rosemary Olive Oil bread from Costco (or any hearty bread of your choice)
Goat cheese
Asiago cheese (or any other creamy white cheese of choice)
Flat leaf parsley
Basil
Butter

The team members:Preheat a cast iron pan over medium heat. In the meantime, prepare your fillings. Finely chop the parsley and basil. Gently mix them together and set the blend aside. Grate the asiago cheese and set aside. Cut loaf of bread into 1/4" slices and pair up two slices each for the amount of sandwiches you need. Spread a nice layer of butter on the outsides of each pair, and place them together, butter side in, and set them aside with the inside of each pair facing up. Using a knife spreader, spread a nice thick layer of goat cheese on the inside of the top piece of each pair. Go ahead. Use as much as you like.
Next, sprinkle a layer of herbs over the goat cheese. Add a thick even layer of asiago cheese on top. When the pan is hot, place the dressed piece of bread into the pan, butter side down. Place the second piece of bread on top (butter side out). Do not touch it, as tempting as it seems.
Allow the bread to grill for 2 or 3 minutes, or until it is nicely browned and the cheese inside begins to melt. Gently press the top piece down so it begins to seal both pieces together. When the first side is nicely browned, gently turn both pieces over to grill the other side.
Again, let it sit for at least 2 or 3 minutes. Because the bread is thick, it will take some time to form a nice grilled, buttery, sinful crust. That is how we like it. Serve immediately just as is, in all its crunchy goodness, or better yet, with a nice bowl of tomato soup (because I had that too!). Enjoy!

Wednesday, April 28, 2010

ALMOST INDIAN CURRY

Much of my cooking inspiration comes from things I like to eat, as well as what's in my refrigerator on any given day. I love a bargain as much as anyone, and since I did get lucky today with a great markdown in the meat department, I was able to prepare 5 lbs. of beef stew meat (purchased for only $1.99/lb), half of which I used in today's meal, and the other half I am going to freeze to use for a second batch. It's what I call "smart cooking." I have to thank Eddie's Aunty Edie for this tip which she shared with me years ago. This recipe got its name as I was perusing different curry recipes, and decided to combine several recipes I found, and used the vegetables du jour (what I had in my refrigerator today). Some of it is traditional Indian-cooking inspired, some are not. I find this type of cooking works best for me. I hope that you'll agree.

ALMOST INDIAN CURRY STEW:
2 - 2 1/2 lbs. stew starter* plus liquids
2 medium potatoes
1 medium carrot or 1 cup of baby carrots3 small long eggplants
1 medium zucchini
12 small sweet peppers, stems removed
1 1/2 T. curry powder1/2 can of coconut milk
Flour or cornstarch mixture for thickening

Cut all vegetables into evenly sized pieces and add it to the stew starter. Check the seasoning, then add the curry powder. Simmer for 15 minutes, then check vegetables for doneness. Re-season if necessary. The very last step is to add the coconut milk and the thickening. Cook for an additional 5 minutes. When all veggies are completely cooked, serve immediately over basmati rice. Enjoy!

Almost Indian Curry Stew

*STEW STARTER (STEP 1)
5 lbs. of stew meat
5-6 cloves of garlic
2 large round onions
Salt and pepper to taste
1/2 c. flour for dredging
Oil for browning
Water or broth

To get started I seasoned the meat with salt and pepper, then dredged it in flour to begin the browning process. Using a heavy iron skillet, coat the bottom of the pan and begin to brown the meat in batches, taking care to only cook enough meat at a time that will cover the bottom of your pan/pot. Remove each batch as it is browned, and hold it in a large bowl. This process is a labor of love and you cannot cook the entire amount at once. When the entire batch is done browning, return everything to the pot, including any juices which have seeped from the meat. Add two whole large onions, cut into large pieces, plus about 5-6 whole cloves of garlic, smashed and stir that around for another minute or two. Add enough water or broth to the pot, just enough to cover the top of the meat pile. I added salt and beef boullion to the water, bring it to a boil, then lower the heat and let it all simmer for about 1 1/2 to 2 hours.

When the meat is about 90% softened, just before it's soft enough to eat, spoon half of the meat and the liquid into a freezable container. You should be left with the perfect portion to create a nice pot of stew.

Stew Starter

This portion will be frozen for a 2nd batch of stew in the future.
It will cut my cooking time in less than half.

Wednesday, April 14, 2010

SUMMER ROLLS

My dear friend, Susan, shared her secrets with me on how to make her version of summer rolls. Elyse and I decided to try it, and were pleasantly surprised with the results. The process of rolling it was much easier than I first remembered, but it will take a lot more practice to perfect the tension in the rolling process. Still, they tasted great and we enjoyed them a lot.

FILLING:
1 cucumber
1 medium carrot
Leafy lettuce
1 pkg somen or your choice of oriental noodles
1/2 lb. 16-20 size shrimp or shredded chicken
Mint
Cilantro
1 pkg rice paper (round)
Sweet chili sauce for dipping

DIRECTIONS: To prepare your items for filling, slice carrots and cucumbers lengthwise into thin slivers. Wash lettuce leaves and drain well. Set aside. Cook noodles according to package directions, rinse well and allow noodles to drain. Leaving shells on the shrimps, cook in salted boiling water for 2 minutes. Turn off heat and allow the shrimps to remain cooking in the hot water for an additional 5 minutes. Drain and rinse in cold water. Peel the shrimps, cut in half down the center of their backs (along the curve of the body) and set aside.

The rolling process needs to be done quickly. You will get better with more practice. When you are ready to begin rolling, take one sheet of rice paper and dip it completely into a bowl of warm water. Drain off excess water and set sheet on a round plate. Carefully lay 2 pieces of shrimp down on the rice paper, about 1/3 way from the edge (farthest away from you). Lay the "outside" (orange side) of the shrimp down. Next, in the following order, layer the remaining ingredients: lettuce, carrot slivers, cucumber slivers, noodles, mint, cilantro, being careful to leave room (about 1") on both sides (left and right sides) of the paper, and also leave room on the side closest to you. This will be your "tucking" edge.Gently fold in the sides of the rice paper, first from the left, then from the right. Carefully brace the layers of ingredients with your fingers, and fold up the edge of the paper closest to you over the top layer of ingredients (probably the herbs). Try to tuck everything in tightly as you begin to "roll" the paper over the remaining ingredients. It is similar to rolling sushi if you have ever done that. You will see why you faced the shrimps with their color side down. As you begin to form a "roll" the shrimps will show through the rice paper, creating a very pretty effect. It will seal together when the remaining portion of paper makes contact with the rolled end.
Cut rolls on a diagonal and serve with sweet chili sauce. Have fun & enjoy!

Saturday, April 3, 2010

SPICY AHI BOWL


1 lb. fresh ahi (or any other type of fish of your choice)
2 T. tobikko (optional)
1 loose handful of sliced green onions
Salt to taste

Dice ahi into small pieces. Add green onions and tobikko, if desired. Squeeze spicy aioli (recipe below) onto ingredients and gently begin to mix. Add more aioli to your desired taste. The fish should be well coated (whiteish in appearance) and well blended with the other ingredients. Serve over hot sushi rice. Garnish with your choice of vegetables (sliced avocados, sliced cucumbers, kiaware sprouts, shogai (pickled sliced ginger), etc. Serve with wasabi and shoyu. Enjoy!

SPICY AIOLI:
1 1/2 cups mayo
Several generous squeezes of Sriracha Hot Chili Sauce (depending on your tolerance of heat). I use about 2-3 tablespoons for the sake of measurement.

In a quart size ziploc bag, mix both ingredients until well blended. The orange color of the mixture will determine your heat - the darker your mix, the hotter it will be. Adjust as desired. Close tightly and remove all the air from the bag. Snip off a tiny piece of the corner and squeeze mixture into a squeeze bottle. Keep it in your frig for several batches of spicy anything! Use it on omelettes, veggies, sandwiches, or whatever cranks your moment.

Thursday, March 4, 2010

QUICHE ME YOU FOOL!

The rain and the wind had me in the mood to create something in my kitchen. When these moments strike, as they often do, I try to start with knowing what ingredients I have on hand, because nothing frustrates me more than wanting to make something, getting all excited about it, then realizing I do not have all of the ingredients. Has this every happened to you? If so, I'd like to hear about it so please feel free to leave me a comment. Well today was different. I quickly thought about what I knew was already in my refrigerator, and with great optimism, I had received a clear sign that I was in the mood for quiche. My mind did a quick inventory, knowing that these items sat waiting for me in the frig: Eggs. Check. Half-n-half. Check. Pie crusts. Check. Broccoli. Check. Cheese. Check. Yes! I was on my way.

The readymade pie crusts I use come in a 2 pack. And I always use the deep dish style, and always try to use both at once. That said, the basic mix recipe will need to doubled for 2 pies.

BROCCOLI AND SALMON QUICHE
Basic quiche mix:
3 lg. eggs
1 c. half-n-half
Dash of nutmeg
Salt & pepper to taste

Filling:
Roasted broccoli tops, cut into bite sized pieces
Chunks of smoked salmon (I used re-purposed baked salmon from a dinner I had previously during the week.). This is optional.
Sliced onions
Slivers or small chunks of cooked potatoes
2 cups of grated cheese (swiss, cheddar, monterey jack, asiago, mozzrella or any other type of firm cheese of your liking)

DIRECTIONS: Preheat oven to 400 degrees. On a large cookie sheet, spread the broccoli evenly. Lightly coat with olive oil, salt and pepper, and mix in about one quarter of thinly sliced onions. Roast for 15-20 minutes, or until vegetables begin to slightly brown.
For quiche pie:
Line a large cookie sheet and place both pie crusts on it. Sprinkle a light layer of cheese on the bottom of each pan. Place a thin layer of potatoes on top of the cheese layer. Add more cheese. Lightly crumble the salmon over the next layer of cheese. Finally, when the broccoli is done roasting, place a layer over the salmon. Top it with the final layer of cheese. Pour the mixture evenly into each pie crust, carefully making sure to fill them evenly, just to the bottom of the "crimped" edge. Do not overflow it. Bake at 375 for 45 minutes, then lower heat to 350 and finish baking it for another 30 minutes or until toothpick comes out clean from the center of the pie. You will see the sides edges of the pies rise up slightly and begin to take on a golden brown color. This is good. Cool for at least 20 to 30 minutes to allow the pie to set. Serve with a side salad and enjoy! This pie is great for any meal.

Wednesday, September 24, 2008

EGGPLANT DIP

4-6 long eggplants
1 sweet bell pepper
3 roma tomatoes
One whole head of garlic
1 can garbanzo beans
Juice from half a lemon or one lime
Olive oil
Salt & pepper

Preheat oven to 375. Skin strips off eggplants and cut in half lengthwise. Cut and clean bell pepper, removing all seeds, stem and core. Cut tomatoes in to thick slices. Cut the top layer off of the garlic head, exposing the tops. Place all items on a baking sheet and drizzle olive oil over everything. Lightly salt to taste and roast @ for approximately 30-40 minutes. About half way through, turn everything over and continue cooking until liquid evaporates from peppers and tomatoes. This may take more than 40 minutes. If so, remove eggplants and set aside until everything else is ready. When all items are cooked, place everything into a food processor. You will need to cut the eggplant into smaller chunks. Add drained garbanzo beans. Add salt and pepper and lemon or lime juice to season. Slowly begin to pulse all ingredients. Your mixture will begin to break down into a pasty concoction. Taste and adjust. Pulse again. Do not overpulse. Your mixture should appear colorful and pretty. Most important, the citrus juice from the lemon/lime will give it a special zing. Spread over crackers or dip some pita bread slices into it and enjoy.

Variations:
Marinated artichokes
Olives
Sundried tomatoes to replace fresh romas.